MX-5 - 1997 1.8i
Background
Having tried a number of methods to increase the somewhat feeble (in my opinion) power of the MX-5, certainly when contending with those people in Britain driving MGFs (who have an additional 13bhp over the MX-5), I needed something with more ooommpphh! Forced induction seemed the best way to go.
Firstly, I had to choose between the s/charger and turbo charging. Simple put, the t/c relies on the exhaust gases - blowing these out of the system. The s/c runs on the inlet, so pressurises the air before it reaches the engine. There are numerous possibilities on the web that involve both options - the question was to determine which would be the best and most efficient. It was also governed by price, so I needed the best available at the right price. There were t/c and s/c models available - both of which were about $2395, so I sent e-mails to the appropriate people and gauged feedback. As suspected, their own system is always the better one - it is hard to determine which is the best option.
After deliberating, I resolved to go for the s/c, to be honest it was purely down to the fact that I liked the idea of having something which required minimal maintenance as well as no turbo lag - and a s/c has always impressed me with the low down torque offered. It also required slightly less "plumbing" than a turbo.
Following conversations with Performance Buyers Club in the USA, I determined that they could offer me the s/c and a J&S knock sensor which I was told was good to have (having now fitted this, I would recommend that is you are spending $2,400 on the s/c, you definitely need the knock sensor to get the best from it).
I will say that Performance Buyers Club were not the most efficient outfit. Numerous e-mails went unanswered and when they were answered it was very curt and generally missed the majority of questions. There are other places to try selling the same goods who may be similar - I can only report on my experience.
I had my s/c shipped to an address in the USA while there on business and I brought it home. Beware - it is one hell of a big box! 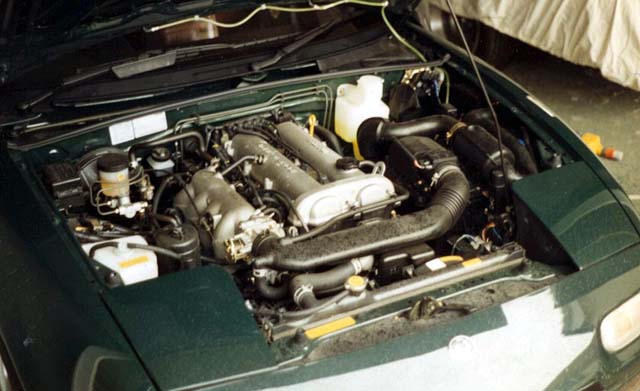
Fitting
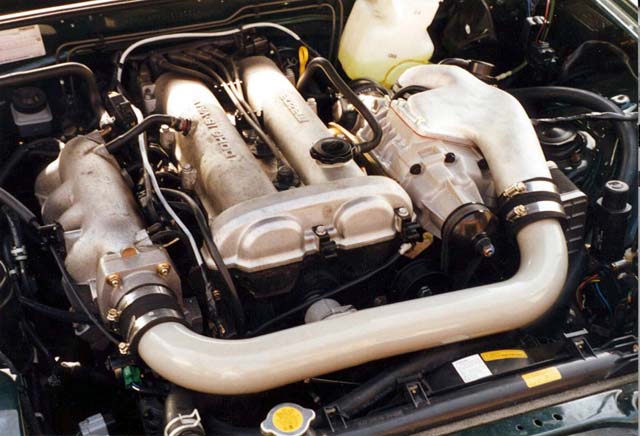
There are loads of parts, and it is very daunting when you open the package. Some elements of the kit are excellent -all well labelled and obvious. Others become apparent as you do the installation, as parts which seemed strange or irrelevant then appear to make sense. Do what the installation manual says - lay every part out and ensure that you have everything. It takes time, but it makes sense. I have to say the actual kit is a work of art - you get a buzz just looking at it. The anticipation was building...
I stayed with a friend (cheers Devin - who, incidentally, also took the bloody good quality photos you see on this page) who is an engineer, so that he could assist. The quoted installation time of five hours is very optimistic - you have to know MX-5s well to do this. We took seven hours - one hour of which was spent puzzling out an issue with the idler pulley - resolved easily enough but more of this later.
Bear in mind that my car is RHD. While the instructions have been altered for RHD, they have never actually set-up on up on this model year car, and therefore some things are not relevant. The key one is the throttle cable, which needs modification.
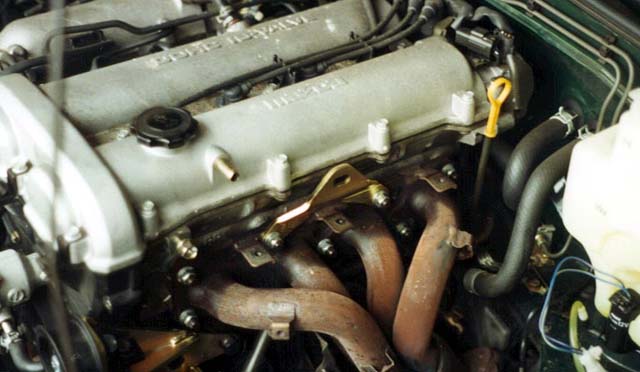
The fitting started well. All is OK and the instructions clearly point out what to do when. Having two people helps enormously - one can put parts together while the other dismantles. I was also fortunate in that my car was 15 months old - none of the bolts were that tight, especially on the manifold. However, make sure you have a good comprehensive toolkit.
Installation is a matter of following the instructions. However, below are the problems encountered (I hope this was all of them):
1 - The throttle cable needed some adjustment to fit (the throttle body is moved, therefore you have to take out the old cable and use the new one supplied. This does not route that well). When first installed, it remained slack. The mounting bracket under the s/c used a one inch long washer to set the adjustment. We had to cut this in half, mounting the throttle in-between the two sections to get a good quality cable connection. Easy solution.
2 - The idler pulley - this is the big one, and the place where the instructions fall down. The booklet provides information for all 1.8 RHD MX5s, whether they have PAS, ABS and A/C or not). It doesn't break these down into sections; rather, and somewhat confusingly, tries to combine them for ease of use. It doesn't work. Basically, the idler pulley is just a rotating pulley that allows the belt to get a better grip on the s/c pulley. It re-routes the belt to give it a greater "holding" range on the s/c. The diagrams generally refer to a pulley system which uses two pulleys and includes the brackets to make this work. We spent one hour trying to get the space to get the two pulleys on. They wouldn't go. By chance we began investigating other options, including using just one pulley (which is referred to but in less details and in a totally different section). This was the answer as the pictures show. 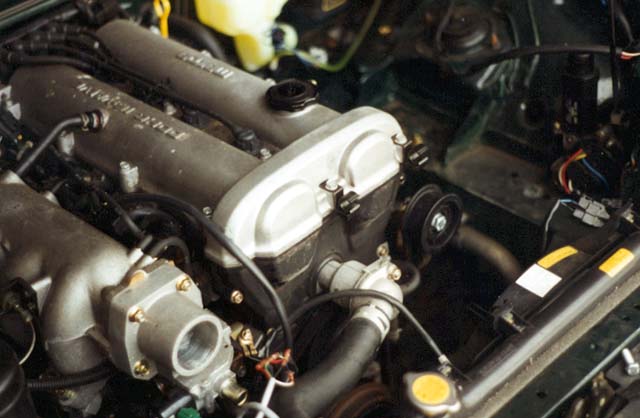 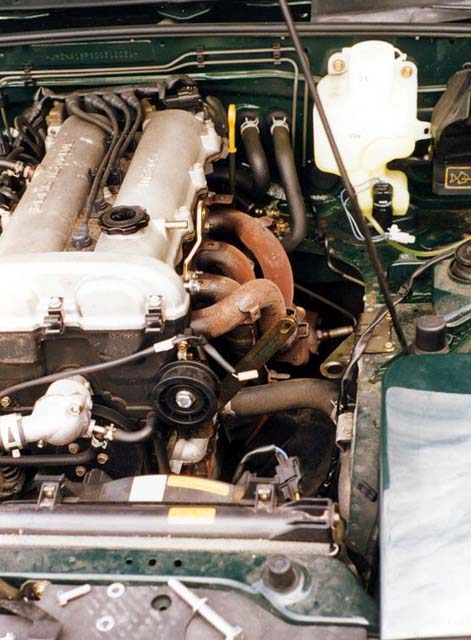 3 - Getting the belt onto the s/c was a pain, but do read the instructions. As long as someone holds the belt on, rocking the car, so a backward slope, does the trick.
We did have issues with squeaking idler pulley. Eventually cured when the fantastic people in Moss Motors in the USA (always deal with them if you can - in contrary to last issues letter, Moss Motors USA were very customer focused). A number of replacement idler pulleys were sent, including an adaptation from plastic to aluminium. This worked a treat!
4 - On cars without ABS, the screen washer bottle needs to be relocated. This is easily done by moving the bottle to the right, when looking at the engine bay from the front of the car. It is at a slight angle, as identified by the pictures, but still works fine.
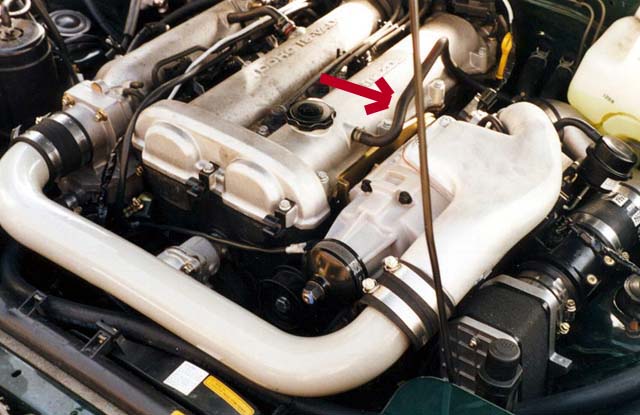
5 - There is a breather/vacuum pipe that must be reinstalled, running from the cam cover (by the oil cap) to the inlet pipe. This is the pipe, on the pictures, that stands above the rest of the engine. It's unusual shape is dictated by its previous position, where it wrapped around the manifold. The instructions discuss a plastic restrictor which is located inside this pipe, that must be kept when you remove it. Well, when I removed mine, there was no restrictor. Without a restrictor, but with the s/c in place, the idling is very lumpy. Amazingly, further investigation revealed that some cars have this, and others don't. So, whatever you do, make sure you get one. Your local Mazda dealer can locate it on the system (mine was flown in from Belgium specially) at a cost of 58 pence. Install that, and it idles fine.
  The J&S Knock Sensor takes some setting up, but it makes all the difference. Without it, the car pinks unless the ignition is retarded to 8 degrees, thus losing loads of low-down torque. With the sensor working, ignition can be advanced to 14 degrees and the system handles the rest.
And - what fun! I love this car. The s/c has now been in place for 16 months and the last 12 have been trouble free. It requires no maintenance, servicing is fine with the local Mazda dealer and the car runs great. I would estimate that with the revised exhaust rear box I have (Borla), the car is pumping out about 185bhp. It whistles beautifully on full throttle, has great acceleration whipping most other cars (and ALL MGFs) and has a lovely sound when the engine is shut-off as the valve releases the air pressure. Classic supercharging in action.
If you were thinking about it, then I'd certainly recommend it. Once fitted it really is maintenance free. Order a spare belt with the kit as they are impossible to get over here, but very easy to source State-side.
And as for Fitz (pictured) he's fine. Regrettably I have now moved to Australia, and am happy to say that P661 FPK has found a new home. All I shall add is that should you see a green MX-5 going past you at high speed, it may just have an addition under the bonnet!
Oh, and if anyone else is thinking about fitting an s/c, and would like assistance or advice, they are more than welcome to contact me via aphilpott@excite.co.uk Good luck to anyone giving it a go - it's worth it!
Andrew Philpott (was member 263) 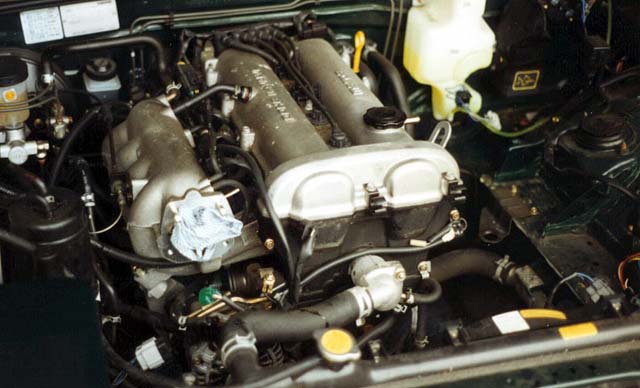 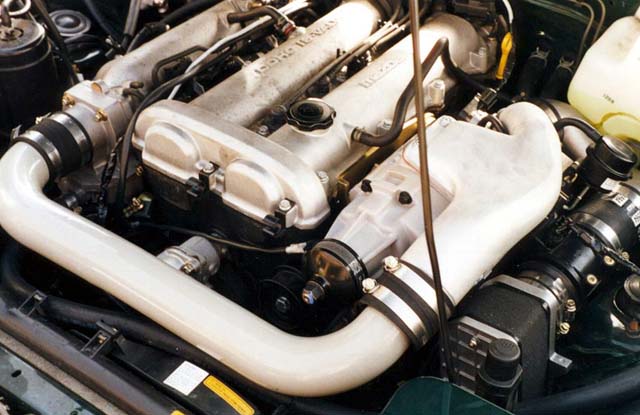 |